Getting started
Ardor is a blockchain-as-a-service multi-chain platform that evolved from the time-tested and energy-efficient Nxt blockchain. The Ardor mainnet launched on 01 January 2018. Through this documentation, you will learn all about the extensive capabilities of the Ardor platform. Begin developing your knowledge by reading about each of Ardor’s distinctive Features or consider trying the technology yourself by following some Basic Tutorials. For developers, documentation is provided for each of Ardor’s more than 250 APIs that can be used to quickly and cost-effectively deploy dApps and smart contracts that integrate your business processes with the Ardor blockchain. Check this site regularly for new content and updates as additional features are released.
Download Ardor
Before we begin, if you haven’t already done so, you may wish to check that you have the correct (usually most recent) version of Java installed on your computer. You can use any compatible Java available for your platform. The minimum required version is Java 8. The recommended version is Java 11. We usually test with OpenJDK 14.
To start with Ardor/Ignis, you must first download the client, also known as a "wallet", on your machine. The client is distributed as a binary package for the following platforms:


![]()

Client Installation
- Download the Windows installer for the latest official Ardor Client 2.6.2 from https://www.jelurida.com/ardor-client.exe.
- Ardor's Windows client comes as an .exe file. After downloading it, you can verify its integrity by performing an integrity check
- Run the installer and follow the instructions on the screen. Note that you can select either the testnet or mainnet during installation, if further details are needed please follow the step-by-step guide. Once installed icons will be created by default in your desktop and Start Menu.
- You can now run the Ardor software by clicking on the Ardor icon. After a few seconds, the Ardor wallet will open in its own window.
- If you already have created an Ardor account, click in 'Returning User' to introduce your passphrase. If you need to create your Ardor account, click here for instructions to Create a New Ardor Account.
- Download the Mac installer for the latest official Ardor Client 2.6.2 from https://www.jelurida.com/ardor-installer.dmg. After downloading, verify its signature. After downloading, check the SHA256 hash of the package for security.
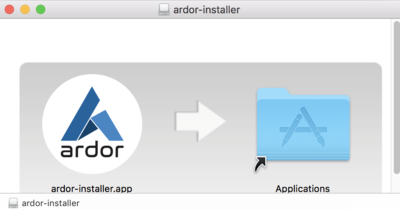
- Run the installer package (Ardor's Mac installer comes packaged in .dmg format) and follow the instructions on screen
- Click on the ardor-installer.app
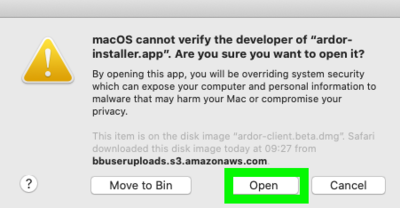
- A security warning appears, click on the icon "?" highlighted in green
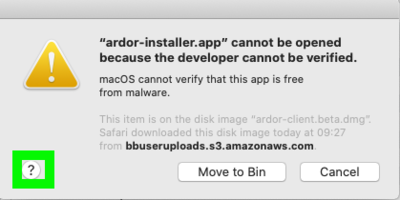
- Click on the "Open the General pane for me" in the pop-up that appears

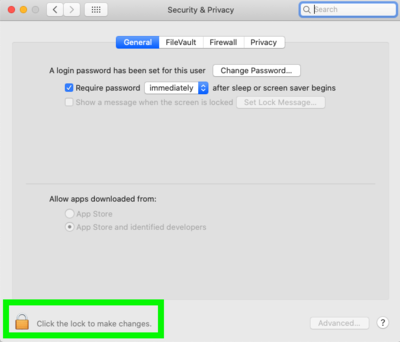
- Click on the lock highlighted in green to make changes
- The option "Open anyway" is now available. Click on this button (note: if it does not appear please close temporary the Ardor installation windows)
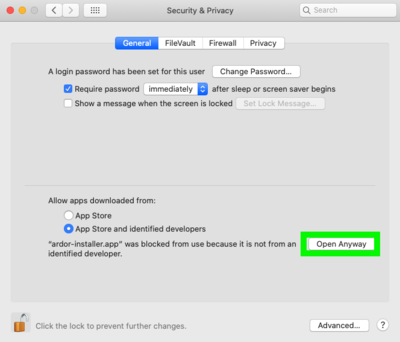
- Now open the ardor-installer.app and click on the "Open" button
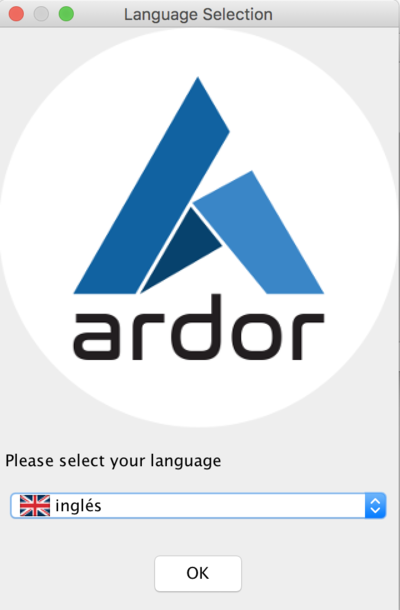
- Select the language
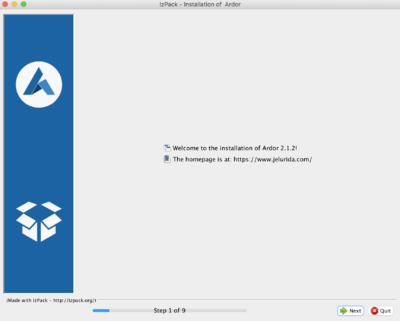
- Click on 'Next' to begin with the installation
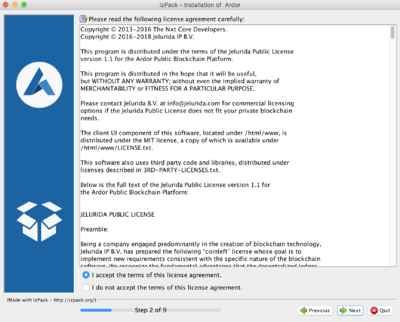
- Accept the terms of the license agreement
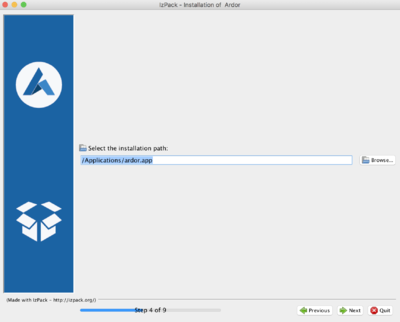
- Select the installation path
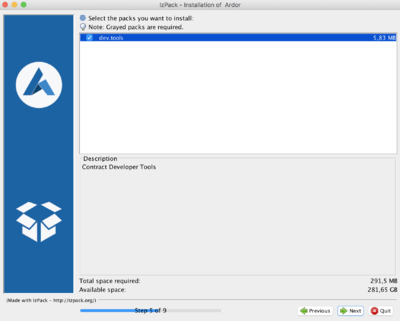
- Select the packages you want to install
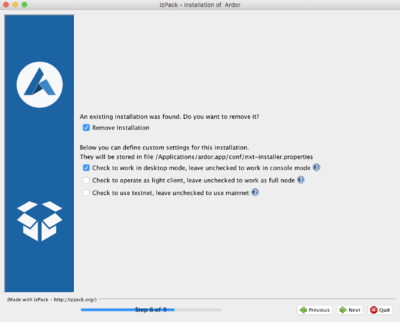
- Check the options See the tutorial for setting up the Ardor testnet
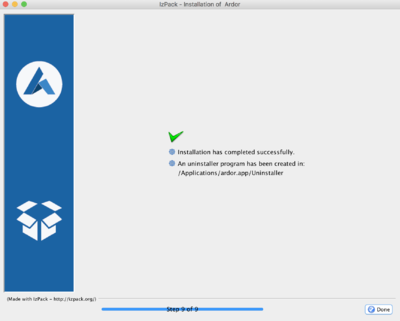
- Once installed, click on finish
- Click on the ardor-installer.app
- You can now run the Ardor software clicking on the "ardor.app" in Applications. If you already have created a Ardor account, click in 'Returning User' to introduce your passphrase. If you need to create your Ardor account, click here for instructions to Create a New Ardor Account.


Here is the guide to installing the Ardor Client on a Linux 64-bit platform. 32-bit installation instructions are very similar; you just might need to download the 32-bit version of Java instead of the 64-bit one.
You can use these instructions on your Linux VPS as well.
Set up Java
You can skip this step if you already have Java installed. Otherwise, you can install it via your distribution repository doing the following (for Ubuntu/Debian builds):
sudo apt update
sudo apt install openjdk-11-jre-headless
You can also use `openjdk-8-jre-headless` or any other Java 8+ compatible version.
Install and run the Ardor Client
Using the Unix installer
You can execute the unix installer executable compatible with most linux distributions from ardor-client.sh and follow the instructions.
wget https://www.jelurida.com/ardor-client.sh
sh ardor-client.sh
Using the Universal Zip Package
You can follow the more generic instructions as explained below:
- Change to your home folder and download the latest client (version 2.6.2):
cd ~wget https://www.jelurida.com/ardor-client.zipwget https://www.jelurida.com/ardor-client.zip.ascand verify that the signature is correct:gpg --with-fingerprint ardor-client.zip.asc - Unzip it:
unzip ardor-client.zipcd ardor
Run the Ardor client
- Now it's time to start the software. You may start it by executing
./run.shor./run.sh --daemonfor running the Ardor node in the background, which you will find in the ardor directory. The server will be active as soon as you see in the window a text similar to this:Ardor server 2.6.2 started successfully.This shell window will be running the Ardor server and print all the Ardor log messages, so it needs to stay running! - Open http://localhost:27876/ from a web browser to access the Ardor Client. Please note that, if it's the first time you run Ardor in your machine, the Ardor blockchain will need to be downloaded until it is up to date. Depending on the your network connection speed, this may take a few hours. The Ardor Client will show you a progress bar as the blockchain downloads. Now you can visit the click here for instructions to Create a New Ardor Account.
- NOTE: If you've installed the client on a dedicated server or VPS, you should change "localhost" to your Server/VPS IP.
For installing the Ardor client on a Raspberry pi, you can refer to the description of an implementation with the Ardor client powered by solar panels
Click on the Android Full Node installation guide and follow the instructions.
Need help?
Need help during the download or development process? Contact us on the slack #helpdesk channel, chat with community experts on the Ardor Forum, and take a look at the FAQ. You can also reach us opening a ticket in our helpdesk
Lightweight Contracts documentation
Lightweight Contracts represent a framework for developing a layer of automation on top of the existing Ardor APIs, refer to the official documentation to read more about this feature:
Login to Ardor
There are different ways to login to Ardor to create an account. It is explained in the Login Page Tutorial
Getting your first ARDR
With the Ardor client installed, it is now time to start transacting. To do that, we need to get some tokens, be it ARDR, IGNIS, or any other childchain. The Ardor mainnet is live and actual tokens are in circulation across numerous major exchanges.
Note the tokens we will be using in the next examples are from testnet. These tokens are not traded in exchanges and have no monetary value -- they exist only as a convenience for developers and those willing to experiment with the features.
The process for receiving testnet tokens is simple. Ask for them in the Ardor Forum, contact us on the slack channel #helpdesk. There is an external faucet as well.
Exchanges
Next steps
Learn how to use the Ardor platform by following the basic tutorials or start reading about Ardor's extensive built-in Features.
Staking
The process of staking in Ardor is called Forging. Once you have more than 1.000 ARDR you can start forging, thus earning the transaction fees when a block is generated by your node.
Furthermore, you can also opted in to the Node Reward Program by just setting up a node with both the API and peer ports open to the Internet and a public and static IP address.
Feedback and errors
If an error in this documentation is found, we would love to be aware to correct it as soon as possible. Please write a question to info@jelurida.com and we will take care.