How to connect Ardor node to IPFS node
Introduction
This guide will show you how to connect IPFS node to Ardor node. You will also learn how to Pin files to the IPFS node, connected to the Ardor node via another IPFS node.
What is IPFS?
IPFS is a distributed system for storing and accessing files, websites, applications, and data. Refer to the IPFS official documentation for more information.
Installing and deploying IPFS node
Please refer to guide for a detailed tutorial about how to install deploy IPFS node.
Connecting the Ardor node to IPFS node
The connection between Ardor and IPFS nodes is possible via a Lightweight contract. If you are not familiar with Jelurida's Lightweight Contracts, please visit this documentation for a detailed tutorial.
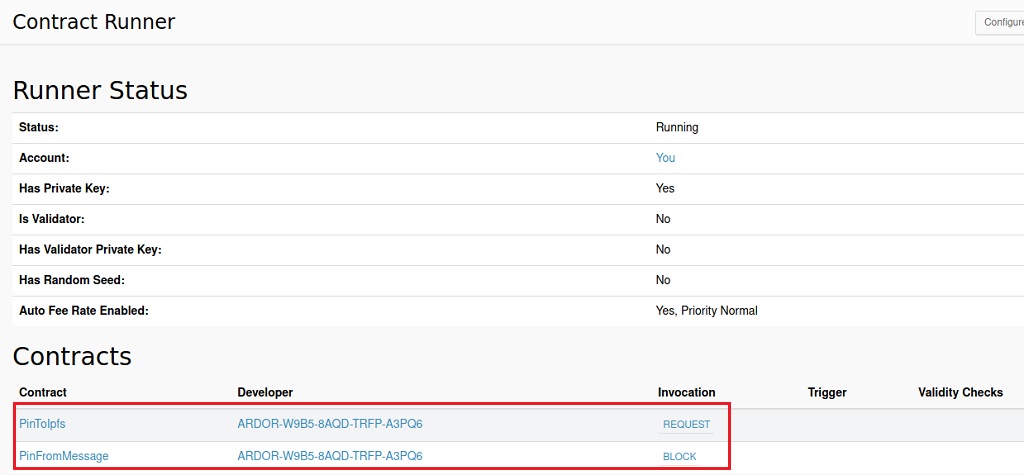
Assuming that you already have running Ardor node with enabled Contract Runner and two IPFS nodes connected to the IPFS network, the next step is to upload PinToIpfs.java and PinFromMessage.java contracts to the Ardor node. If you don't know how to deploy contracts, please visit our tutorial for Lightweight Contracts. After successfully uploading the contracts, you will observe the following in the Contracts menu:
Your Ardor node is now connected to the IPFS node. If you are wondering which IPFS node is exactly connected, it's to the one with default IPFS settings, or you may call it the initial IPFS node (The default address of the IPFS API can be configured, please refer to the Configuring parameters section below).
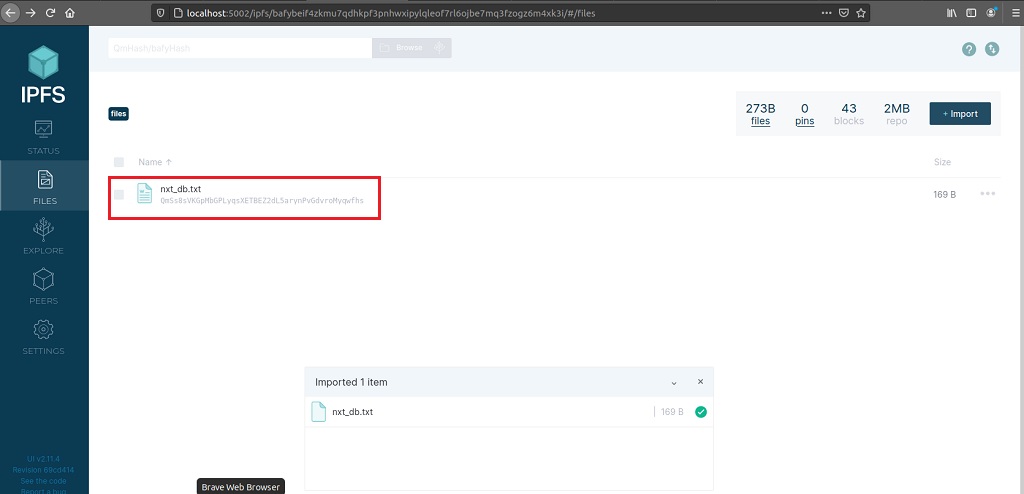
Now let's see if the connection was indeed successful. Let's navigate to the Web UI of the second IPFS node,in our case that is http://localhost:5002/ipfs and make sure we have uploaded a file.
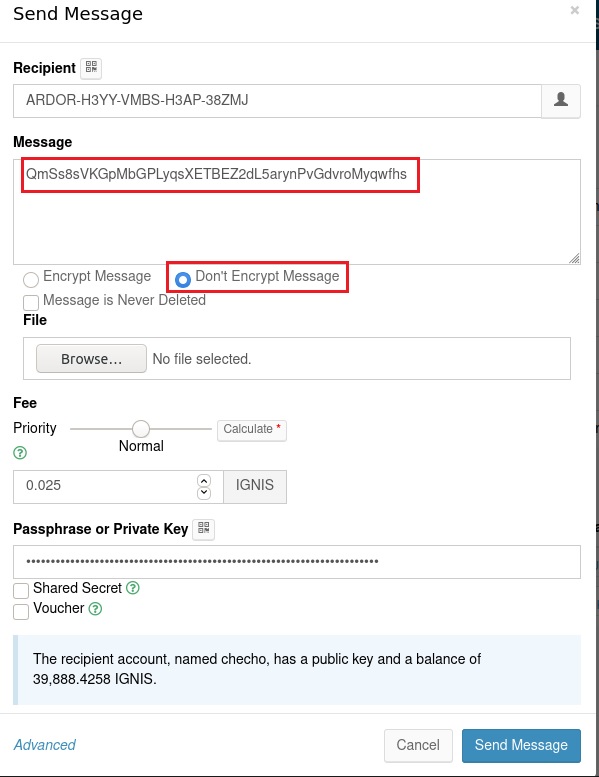
The next step is to copy the CID of the uploaded file and open the Ardor app. As the name of the contract suggests, we have to issue a transaction with a message, it can be Send Money, Send Message, etc., as long as a message can be attached. We will simply send a message and paste the copied CID:
An important thing to remind here is that the message has to be non-encrypted, otherwise the operation will not work.
- Wait for the transaction to be confirmed and published to the blockchain
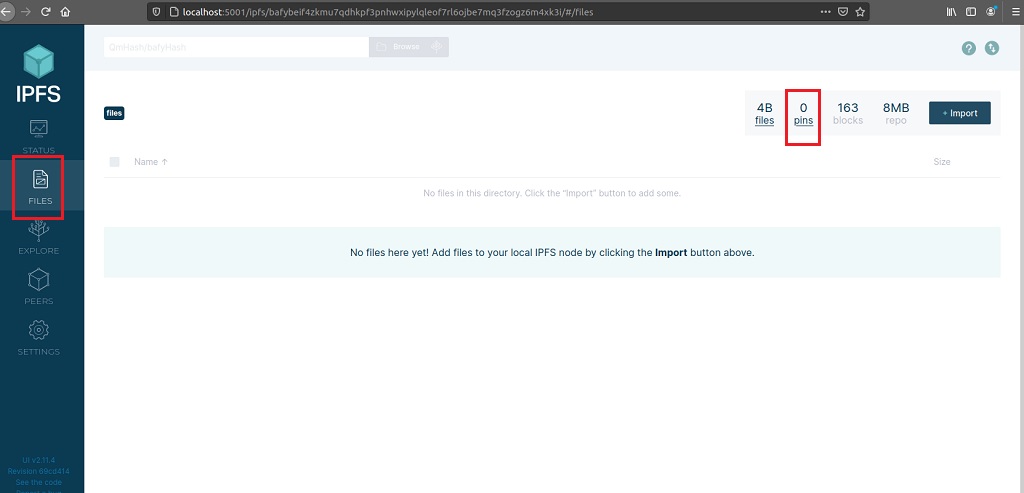
- Open the Web UI of the initial node
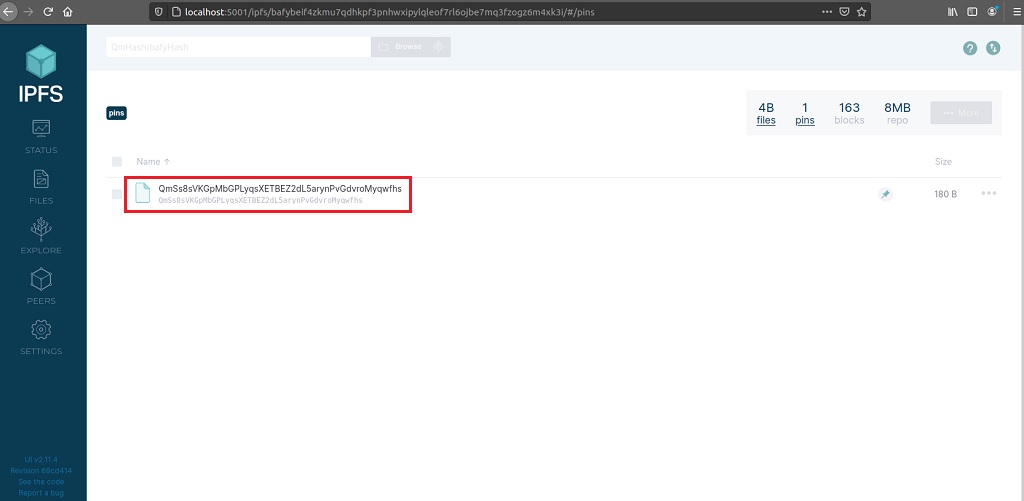
localhost:5001/ipfs - Click on FILES on the left panel and as you already guessed, our file should be located in pins menu,
- You can open it. If you don't see the file, please refresh the page.
Configuring parameters
Max Pin Size
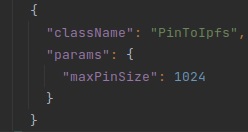
If you want to limit the size of the pinned files, you can do that by configuring the maxPinSize parameter. It can be done by either adding contract.PinToIpfs.param.maxPinSize=size_in_bytes in nxt.properties file or editing the contract.uploader.json file and adding this code:
As you can see, the max pin size is set to 1024 bytes.
IPFS API Address
The default IPFS API Address can be configured by changing the ipfsApiAddress parameter. It can be done by either adding contract.PinToIpfs.param.ipfsApiAddress=http://127.0.0.1:5002/api/v0 in the nxt.properties file or editing the contract.uploader.json file and adding this code:
In the example, only the Port is changed from 5001 to 5002.

