How to deploy IPFS node
Introduction
The InterPlanetary File System (IPFS) is a protocol and peer-to-peer network for storing and sharing data in a distributed file system. IPFS uses content-addressing to uniquely identify each file in a global namespace connecting all computing devices.
IPFS allows users to not only receive but host content, in a similar manner to BitTorrent. As opposed to a centrally located server, IPFS is built around a decentralized system of user-operators who hold a portion of the overall data, creating a resilient system of file storage and sharing. Any user in the network can serve a file by its content address, and other peers in the network can find and request that content from any node who has it using a distributed hash table (DHT).
For more detailed info, you can visit the IPFS webpage.
Installation
IPFS can be installed and deployed via several methods:
1. IPFS Desktop
2. IPFS Companion, a browser extension that simplifies access to IPFS resources and adds support for the IPFS protocol.
3. IPFS Command-line
The installations are explained in details in the IPFS webpage, please refer to the links above.
Deployment
If you decided to use IPFS Desktop or Companion, then the deployment is done automatically for you, however, the command-line method requires a bit more. Please visit the docs.ipfs.io page for detailed instructions.
Deploying more nodes
You don't need a second machine/ip in order to deploy another IPFS node. Yes, that's right, you can deploy as many nodes as you like on one machine, but there are some configurations, which have to be modified.
Let's say that you already deployed a node, it is running and visible to other nodes on the IPFS network. Now if we open another terminal window and try to start another ipfs daemon, we will get this error:
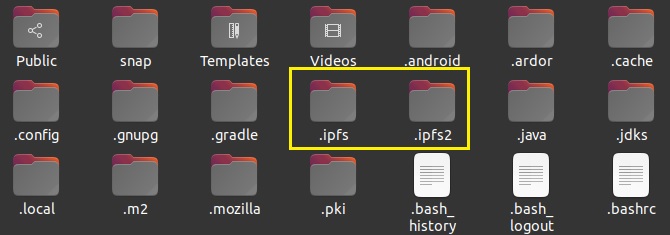
This basically means that we cannot run more than one node from the ipfs folder, but if we want, we should initialize new node in another folder. Let's open open another terminal window and run the command IPFS_PATH=~/.ipfs2 ipfs init. As you can see, we changed the default path of the ipfs and now we created a new node at ~/.ipfs2:
The name ipfs2 can be whatever you like, not necessary to be that specific one, it's just the directory of the second node.
Now let's open the ipfs2 folder, inside there should be a config file:
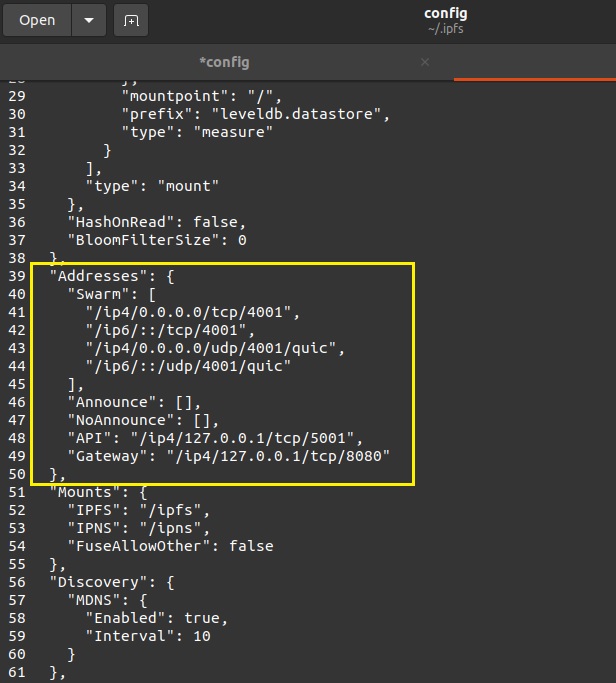
Open the file, it's the configuration of the node - Peer ID, Api, Adresses, Swarm, etc.. We are looking for the Adresses config, should be on line 39:
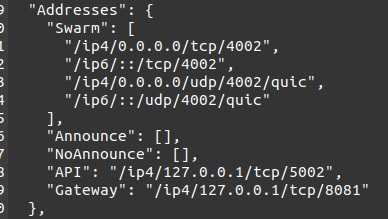
The modifications, which have to be made, in order for the second node to run, are to change the Ports of the Swarm, API and Gateway configs, so they can be different from the default ones (4001, 5001, 8080):
As you can see, we changed the default Ports - 4001 to 4002, 5001 to 5002 and 8080 to 8081. Of course, you can choose other numbers, as long as they are different from de defaults and not interfere with other Ports.
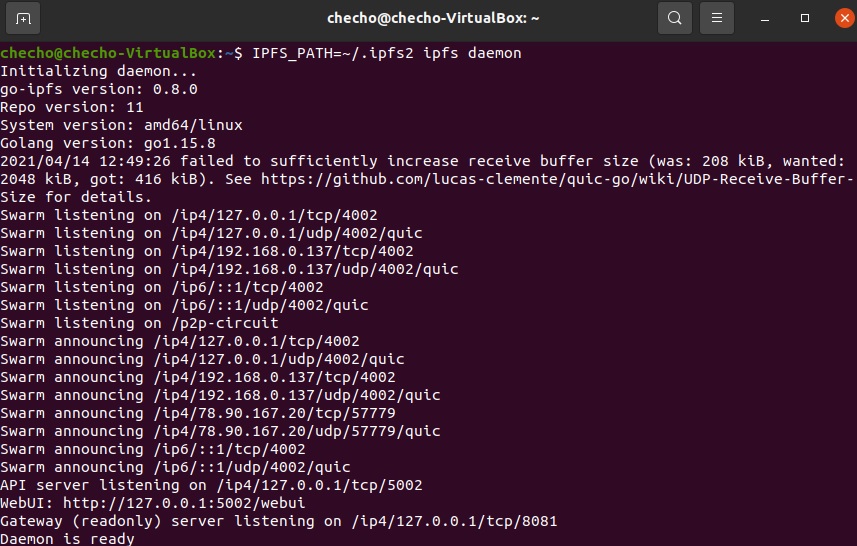
Now let's open another terminal window and try to take the node online. The important thing to be remembered here is that the PATH to the second node should always be specified, when trying to run commands on it - IPFS_PATH=~/.ipfs2 [command]:
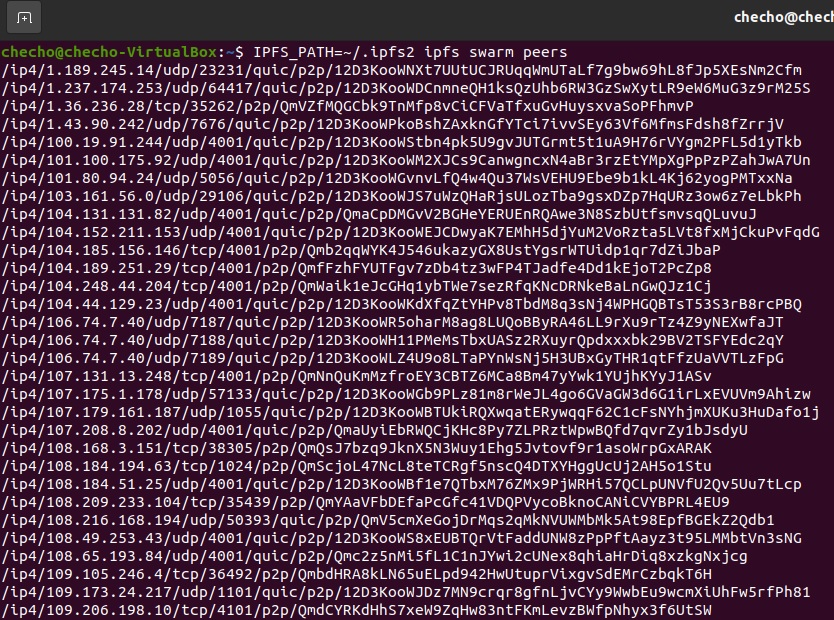
And there we go, our second node is online, now open another terminal window and run ipfs swarm peers command (remember to specify the PATH):
File transfer between nodes
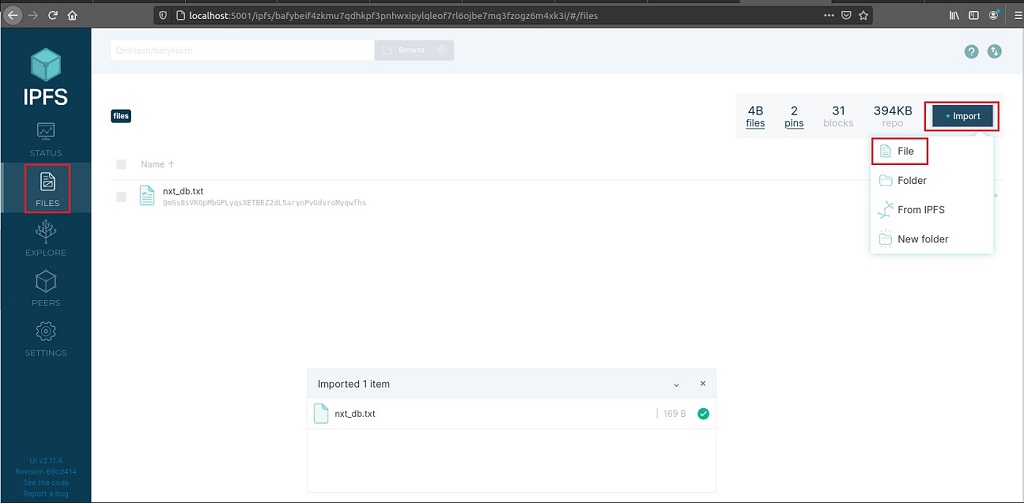
With our two nodes up and running, let's do a simple test and try to transfer a file between them. Of course we can use the command-line commands, but let's see how the Web UI can handle this. Open your browser and make two tabs, the first with localhost:5001/webui URL, and the second with localhost:5002/webui (or your port, if it's different from 5002).
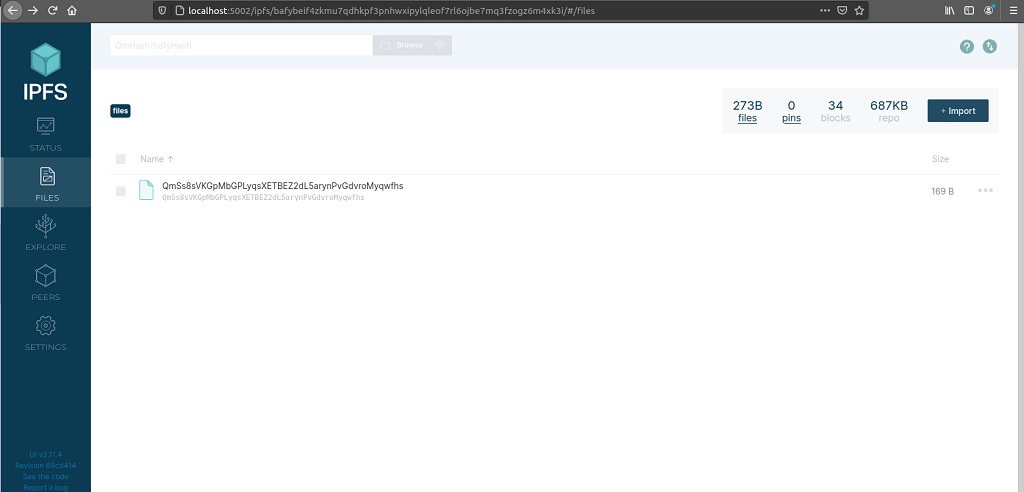
Choose the node, where you want to upload a file, open the FILES menu on the left and on the right there should be Import button. Click on it, choose File from the dropdown menu and then select the file, which you want to upload. In the image below, we chose nxt_db.txt file.
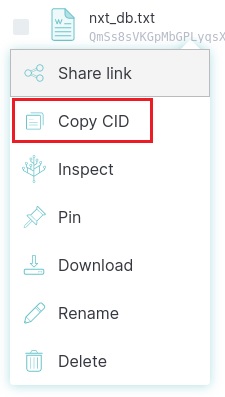
Now we have to copy the CID of the uploaded file, simply right-click on it and select Copy CID.
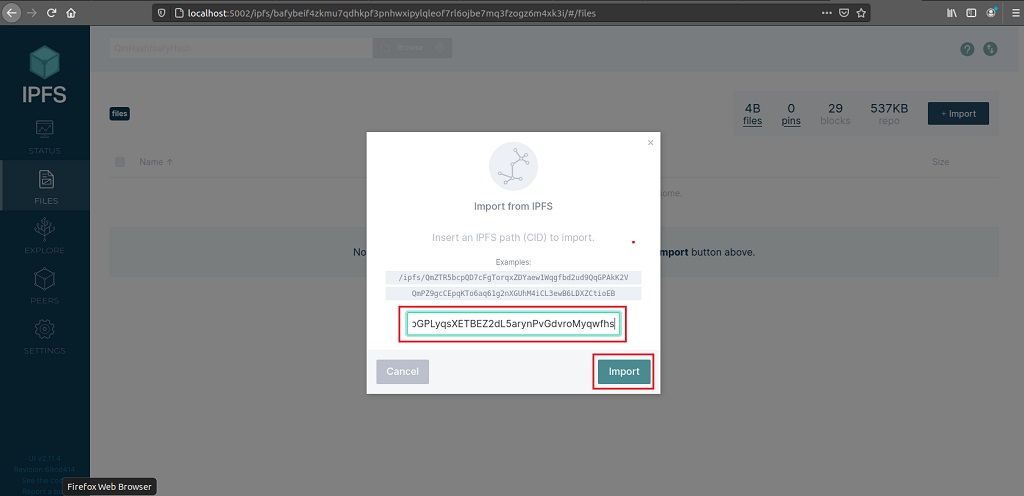
Switch to the other tab, where the Web UI of the other node is running. Again, open FILES menu on the right and click the Import button. Now choose From IPFS option, a pop-up menu will appear, where you should paste the copied CID and click Import.
Et voilà, the file was transferred successfully. If you don't see it immediately, just refresh the browser page.
Troubleshooting
NAT Configuration
A common issue for new users running IPFS, especially on home networks, is that their IPFS node is sitting behind a NAT (network address translation). It's common for people who run an IPFS node on their home network to have very long wait times or a high rate of request failure. This is because the rest of the nodes on the IPFS network have difficulty connecting to them through their NAT.
Please refer to the tutorial in https://docs.ipfs.io about how to configure NAT.
Virtual Machine
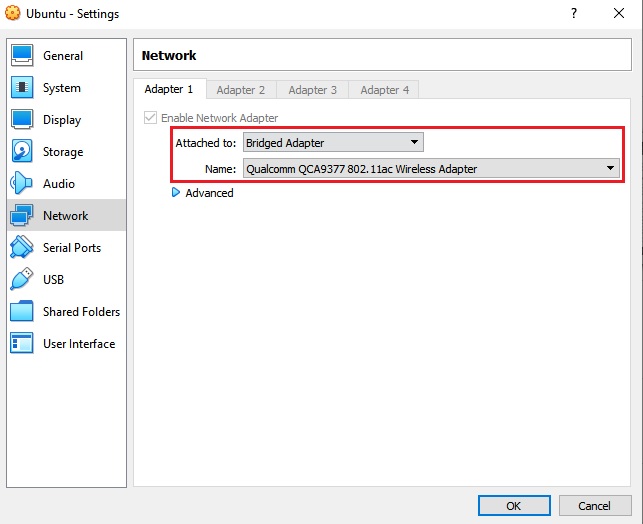
If you are running your node/s through a virtual machine and you experience problems with your node/s connection, you might need to change the Network of the Virtual machine to Bridged (example on Oracle VirtualBox below:


