Emulating Multi Signature Accounts on the Blockchain
Introduction
One of the most powerful aspects of the Ardor platform is its ability to facilitate composite multi-phased transactions. But what does this mean in practice?
Let’s take a look at one of the most basic use cases of this feature: replicating a secure and transparent multi-signature account. First, we will run through the simple two-step set-up that involves creating an Approval Model and setting the Account Control. Then, we will take a look at how to approve transactions and modify an existing approval model.
Before Starting
It is essential to understand Account Controls are set up on child chains. Once Account Control is activated, all child chain transactions originating from that account will be subjected to the pre-defined Approval Model. Additionally, once Account Control is activated, transactions on the Ardor parent chain will be disabled until the Account Control is removed. Therefore, consider moving your Ardor funds, as well as any child chain tokens you do not want to be subjected to multi-signature approval, to a different account prior to proceeding.
Please note: Ardor main net version 2.2.2 has a bug preventing multi-signature transactions from being submitted to a remote node.; however, the transaction can be submitted to a local node and a fix has already been implemented on test-net and will be made available on mainnet in the next software release. The process below was completed when connecting to the Jelurida Ardor test net that already implements the fix.
Example situation
You are a grant manager for a nonprofit organization and you need to disburse the next payment for one of your grantees. Payments must be co-signed by at least 2 of the 3 finance department lead accounts noted below:
- Chris: ARDOR-XC6S-U47K-W2LN-2XSK2
- Sam: ARDOR-FUBN-YG6U-6UWS-9LNRE
- Erin: ARDOR-63EF-NL2A-WWNC-6JL6N
Step 1 – Replicating a Multi-Signature Approval Model
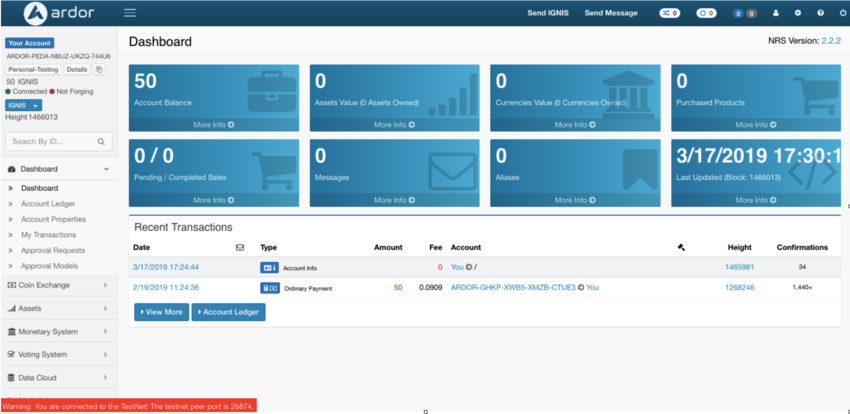
Open the Ardor client wallet and log in to the Ignis child chain with your own account.
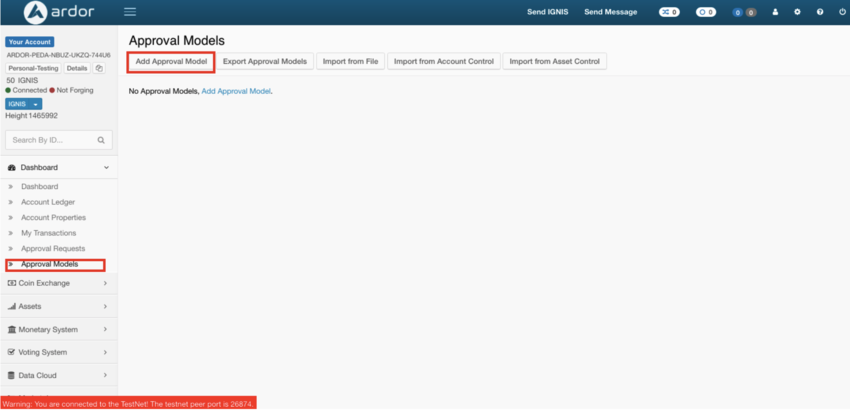
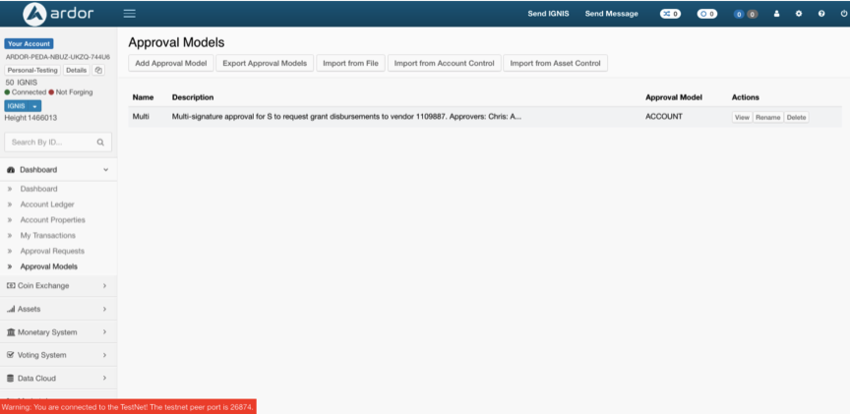
Click on the Dashboard, navigate to Approval Models, and click Add Approval Model near the top of the screen.
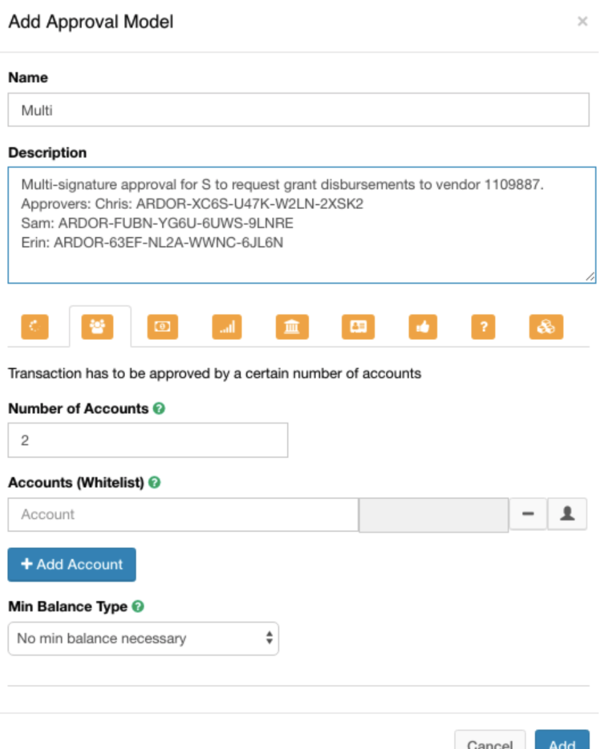
In the pop-up box, click the ![]() icon and enter a 5-character name for your Approval Model and include a description.
icon and enter a 5-character name for your Approval Model and include a description.
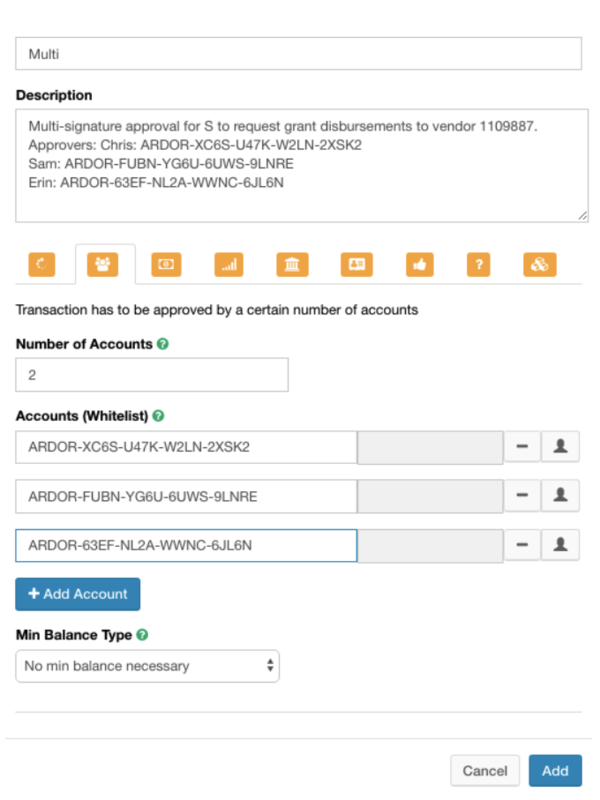
For the Number of Accounts, enter 2 since we need 2 out of the 3 finance leads to approve each transaction. In the Accounts (Whitelist) section, add the Ardor Account addresses for Chris, Sam, and Erin by using the Add Account button to add two additional whitelisted accounts.
Min. Balance Type can be used as a more granular filter for accounts on the whitelist. This is not relevant for this simple example.
Click Add.
You have now successfully emulated a multi-signature approval model. Now, you need to put it into practice.
Step 2 – Setting up a Mandatory Approval
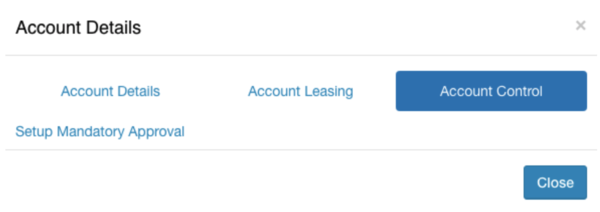
Make sure you are still on the Ignis child chain. Click on your account balance in the upper left corner.
Navigate to the Account Control menu and click on Setup Mandatory Approval.
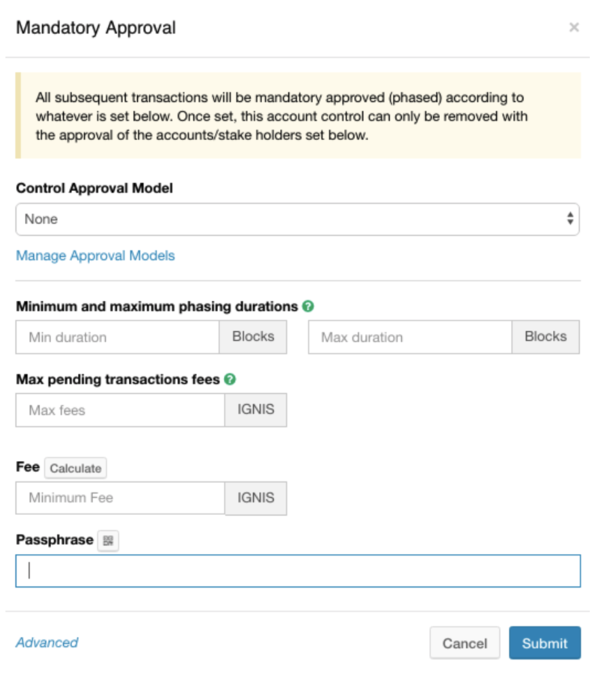
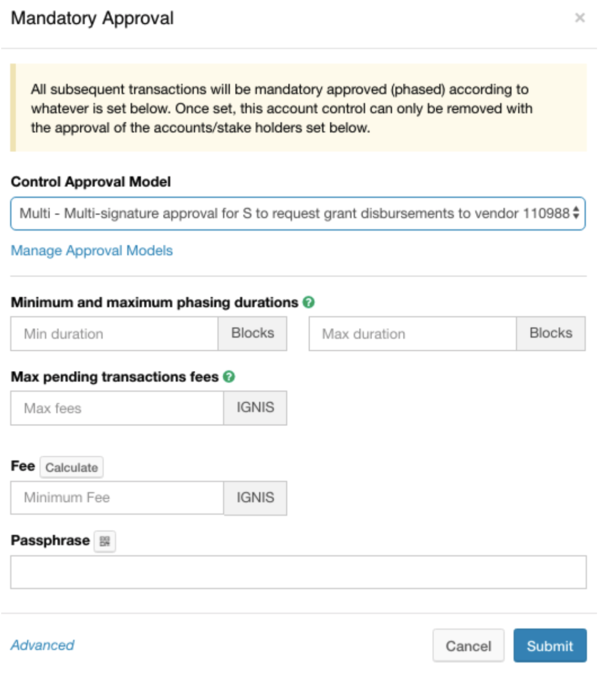
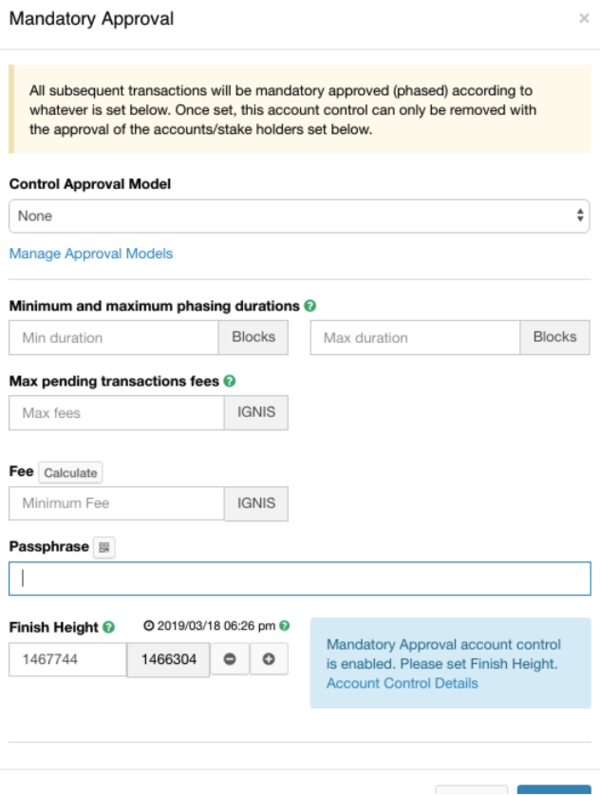
You will see the following pop up box.
Use the drop-down menu to select the approval model you created in Step 1 for the Control Approval Model.
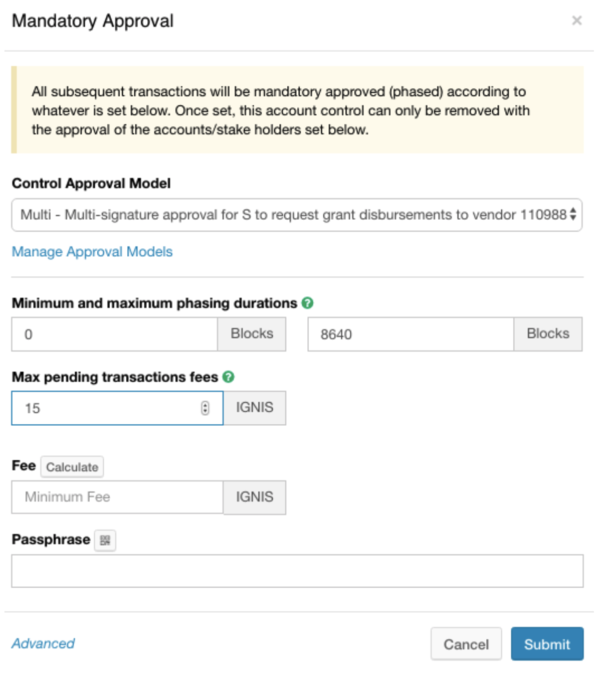
Next, we must complete the Minimum and maximum phasing durations. The minimum phase duration basically means each time you submit a transaction, it will be delayed by this many blocks before it is sent to the approvers - the finance leads in our current example. The maximum phase duration means any transactions you submit will expire if they are not approved within that amount of time. Note 1 day is approximately 1440 blocks on mainnet but 8640 blocks on testnet.
Max Pending Transaction Fees is a mechanism for protecting your account against a malicious actor draining your account balance. Since your account is subject to an approval mode, they can’t send your funds to themselves since the finance leads will notice these transactions and reject them. However, each time you submit a transaction to the finance leads, there is a transaction fee. This means this person can drain your account balance by submitting a large number of errant transactions. Setting a limit on the Max Pending Transaction Fees protects your account against this type of attack. Note that this will also limit your own account from submitting too many pending transactions so you should put considerable thought into setting a reasonable limit that does not impede your day-to-day work, but still limits losses in the event of an attack.
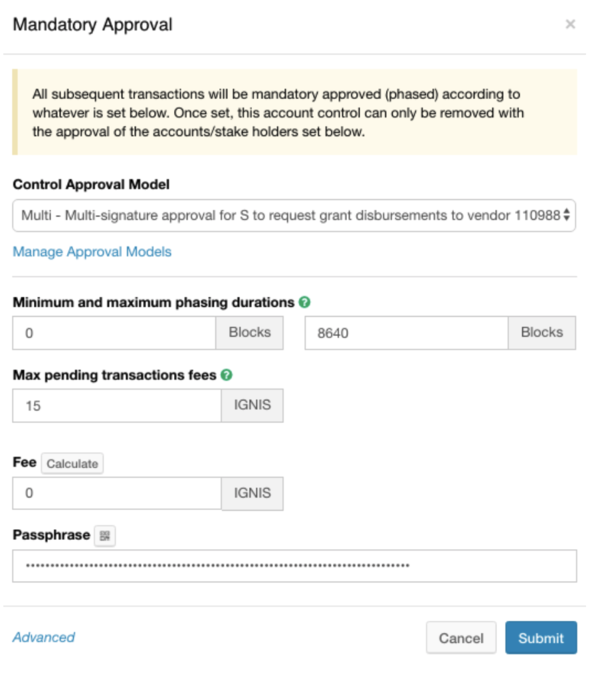
Next, you simply Calculate your minimum fee and enter the passphrase for your account before clicking Submit.
Note that at the time this guide was written, there was a bundler providing free transactions for the Ignis child chain on the Ardor testnet. This is to demonstrate the platform’s ability to provide a seamless 0-fee app experience for end-users; however, most public bundlers on the Ignis and Ardor main net charge fees similar to those described here. Learn more about customizing your own bundlers in the basic and advanced guides.
Once the next block processes, your multi-signature account is active. All future child chain transactions will be subjected to this approval model, not just those on Ignis.
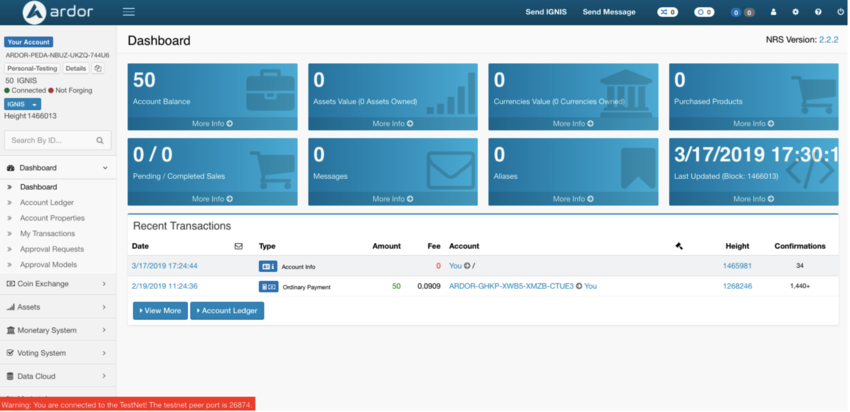
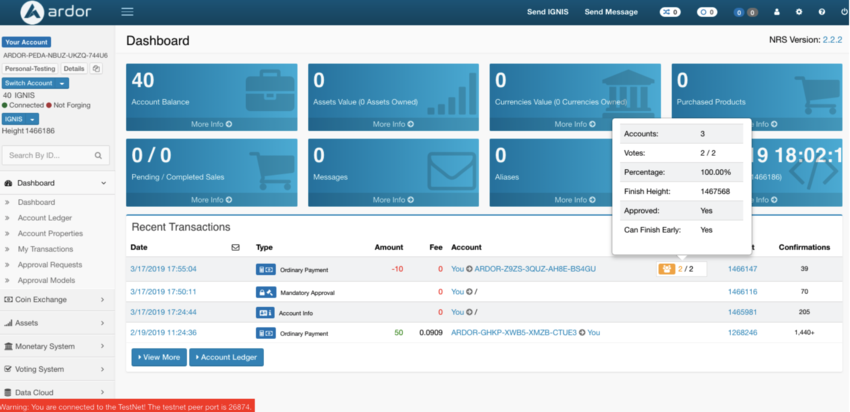
Go ahead and submit an Ignis transaction from your own account. The transaction will show up in your Recent Transactions like in the photo below and it will update as Finance team members approve your request.
Approving the Transaction Request
Now, we log-in to the Ignis child chain using Erin’s account and click on the Dashboard.
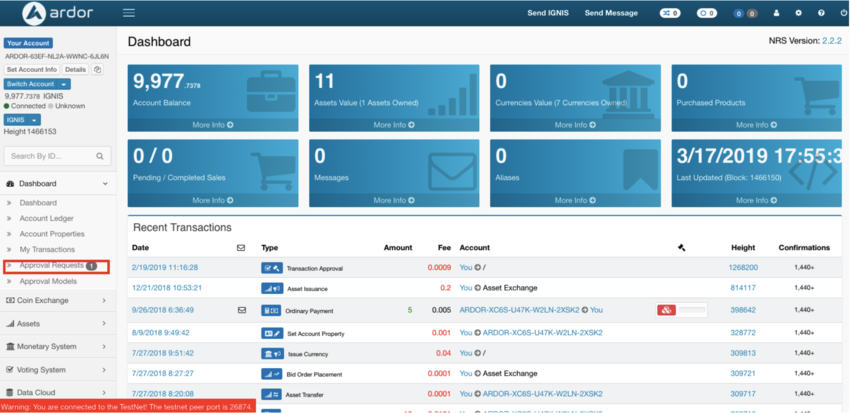
You will notice the Approval Requests has a notification for one item requiring approval. Navigate to the approval requests.
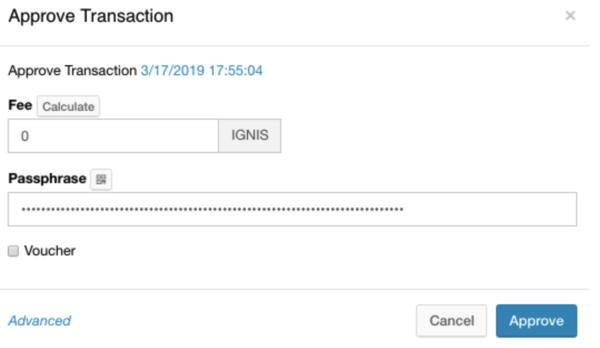
Erin will simply click the Approve button and a pop-up box will appear.
Erin will enter their passphrase in the pop-up, calculate the minimum fee, and Approve
Check your Payment Status
When you revisit your personal dashboard, you will see your transaction has received 1 of the 2 necessary signatures for disbursement:
At this point, you are waiting for Chris or Sam to approve the payment in addition to Erin. Once one of them does this and the 2 out of 3 Finance Lead signature requirement is met, the payment will be made. The final individual will not have the opportunity to sign the transaction – once the requirement is met, the transaction is submitted and removed from the pending requests for all 3 Finance Leads. Let’s see what your interface looks like once the second signature has occurred:
Modifying an Account Control
Staff turnover happens. Let’s take a quick look at how we would modify an existing Account Control under a Mandatory Approval Model. Note that this change request will still be subjected to the EXISTING approval model. So, if Chris leaves the company, you will need both Sam and Erin to approve this request for the new approval model to take effect.
You’ll set up your new Approval Model using the guidance in Step 1 above. Once you have created the new approval model, we need to replace the existing Account Control.
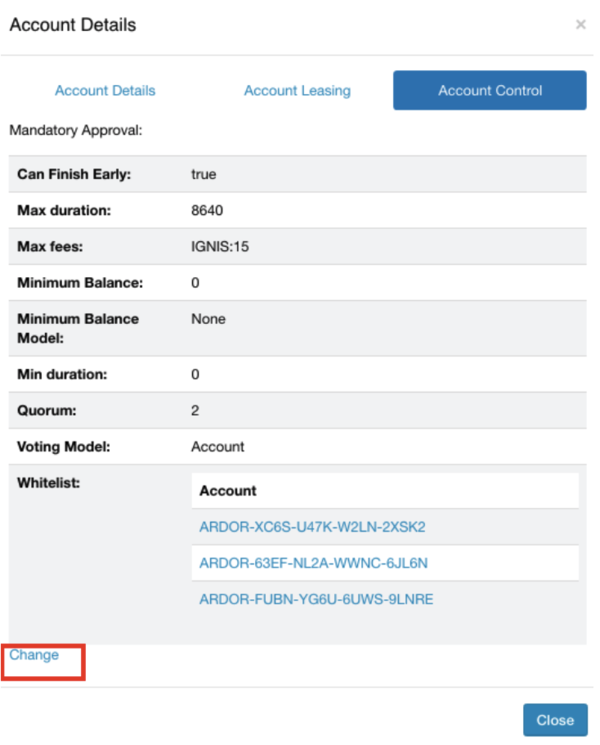
To do this, log in to your account and click on your account balance. Navigate to the Account Control tab and click the Change button on the relevant entry.
A familiar pop up box appears.
Complete the new account control request similar to how it was explained in Step 2 above. The new approval model will take effect once this transaction has been submitted to and approved by the EXISTING approval model.

