Tutorial on custom bundlers for child chain transactions
This guide provides details on how to set up a filtered transaction bundler for child chain transactions. If you are new to the concept of bundlers and the way they help businesses customize end user fees and hedge against market volatility, it is recommended that you begin with the Basic Bundlers guide.
In August 2018, Jelurida released 5 custom bundler templates that can be interwoven to create complex customized fee structures for end users for blockchain based apps and services. In this guide, we will be reviewing the process for creating a whitelist of accounts so that your bundler only pays to package transactions originating from those accounts, using a filtered bundler template. For a list of the other bundler templates that are available, see the release notes.
Remember these are some common options to make adoption easier for businesses — but if these do not meet your needs, the option to write your own custom bundler is always available. Default filters provided "out-of-the-box":
| Name | Description | Parameter |
|---|---|---|
| PersonalBundler | Only bundle the transactions of the bundler account | |
| PropertyBundler | Only bundle transactions sent by accounts which have the "bundling" property set on them by the bundler account | |
| AssetBundler | Bundles only transactions for asset with ID provided as parameter | Asset ID (numeric) |
| CurrencyBundler | Bundles only transactions for MS currency with ID provided as parameter | Currency ID (numeric). This is not the currency code |
| PurchaseBundler | Bundles only purchases of digital goods sold by an account provided as parameter | Account ID (numeric or RS format) |
| QuotaBundler | Bundles transaction until the quota per account and transaction type is reached. The quota is provided as parameter. | Max number of transactions per account and transaction type that will be accepted by the rule |
| TransactionTypeBundler | Bundles only transaction types provided as parameter. | Comma separated string, which contains the <type>:<subtype> pairs specifying the "type" and "subtype" identifier of the whitelisted transaction types. The "type" and "subtype" identifiers can be found in the transactionSubTypes field of the getConstants result. E.g. "7:1,7:2" bundles only ShufflingRegistration and ShufflingProcessing transactions. |
Additional filters can be developed as add-ons by implementing the Bundler.Filter interface. Their classes must be added to the nxt.availableBundlingFilters property.
The information presented in this piece represents a modified version of the information in the section video tutorials, custom bundlers
If you would like to set-up a filtered bundler, you must hold a minimum of 1000 Ardor in your wallet and you must download the Full Ardor Client Wallet from the Jelurida website. Refer to the guide How to download the Ardor client wallet
Limiting the Transactions You Pay to Bundle: Account Property Bundler
Consider this — if you were to set up a basic bundler like we did in a previous guide, and you set the “Minimum Rate” to 0, there is a high likelihood the network would be spammed and your Ardor would be burned through with no value creation. This is because literally anyone could take advantage of your 0-fee bundler. With the Account Property Bundler, we can limit this pool of participants. Businesses that charge membership fees already have a list of verified accounts. Therefore, you can utilize the Account Property Bundler to create a whitelist so that your Bundler only packages 0 fee or low-fee transactions originating from those accounts.
Setting Up the Account Property Bundler
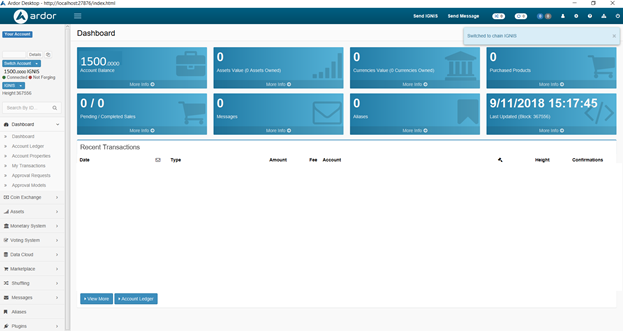
This process is a bit more advanced but it only takes a couple of minutes. The first thing we need to do is open the Ardor wallet and log in to the Ignis chain.
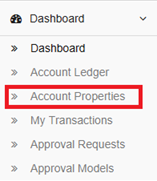
Once we log in, let’s select “Account Properties.”
In the upper right corner, click “Set.”
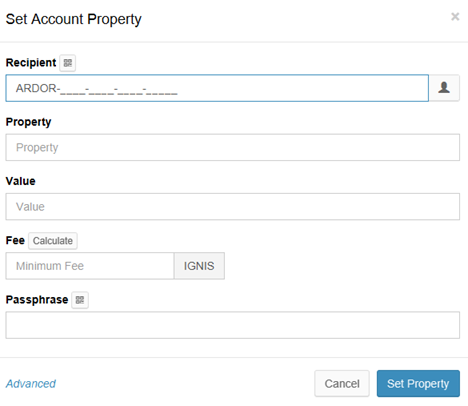
A new dialogue appears:
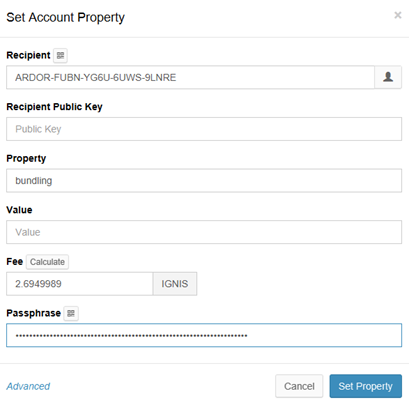
Here, we will enter the first whitelisted address in the “Recipient” line. Under “Property” we will enter “bundling” and under value we do not need to enter anything. Perhaps you have client ID numbers or other information you want to include.
Enter your passphrase, click calculate, and then hit “Set Property.” Wait for the next block to update and you will see the account listing on the “Outgoing” tab of the Account Properties.
Editing and Updating Account Properties
You can edit this update or delete the properties of this account using the functions in the “Actions” column. Or, simply continue setting up more whitelisted accounts. Once you are satisfied with the accounts on your list, you’ll need to launch your Bundler.
Setting Up the PropertyBundler filtered Bundler
Once we have properly set up the properties for the accounts that we want to sponsor the fees for, we have to launch the bundler. In order to do that we can use the Ardor wallet directly with a few simple clicks.
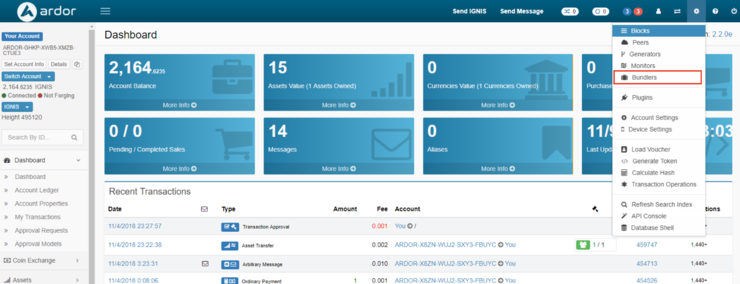
In the upper right corner select Bundlers under the settings option
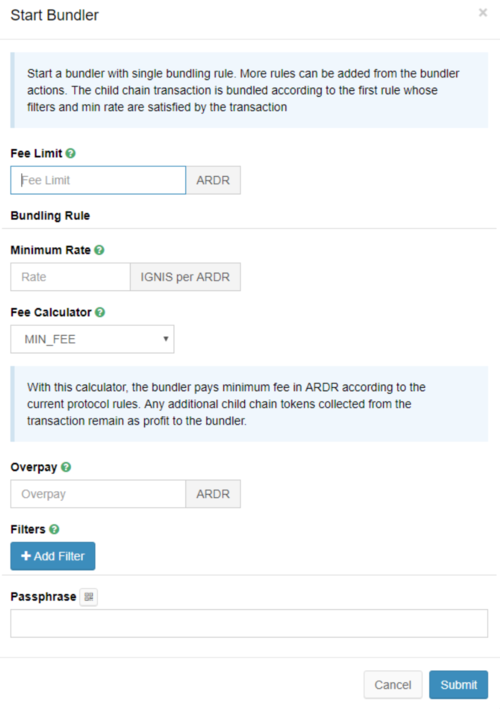
The bundlers options will appear in the wallet. Then click on the "Start" box in the upper right corner as shown in the following image:
Here is where the bundler is configured. Select the options required for the Fee Limit, Minimum Rate, Fee Calculator, Overpay as required (see the tutorial on basic bundlers if in doubt with these values).
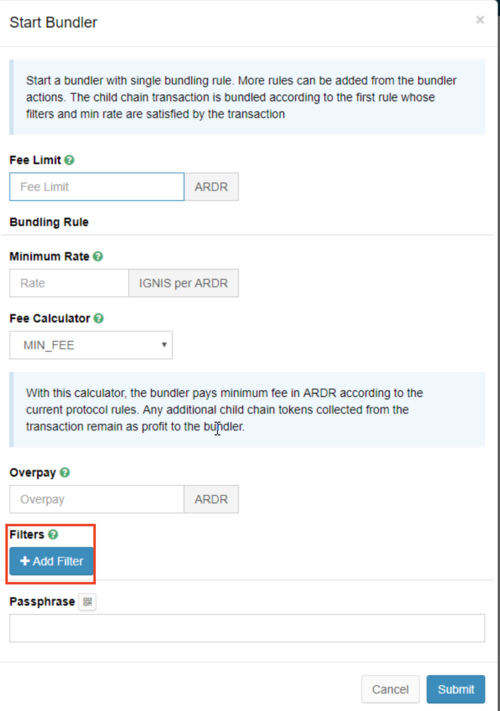
Afterwards, we have to configure the filter. Click on the cogwheel called "Filters":
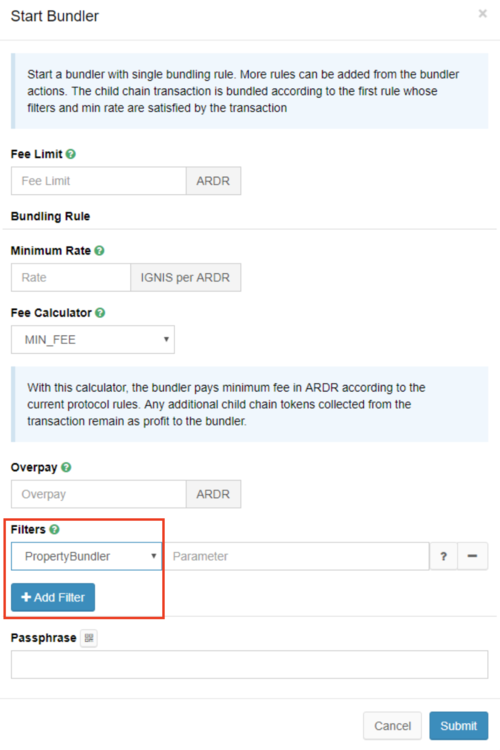
Finally, select the Filter called PropertyBundler, which makes the bundler only bundle transactions sent by accounts which have the "bundling" property set on them by the bundler account
As a final step, type your passphrase and click on the Submit buttom. The bundler starts running then.
Creating Tiered Fee Structures with Bundlers
An important point to understand is this — the Bundler on this node will only function for the accounts listed here. If you would like to run a tiered fee structure, you will need to run a separate node, whitelist, and bundler per tier. For example, if you want a public bundler at the market rate and one with 0 fees for your paying members, you will need to run 2 nodes — the public node could utilize the basic bundler functionality, while the 0 fee member rates could be achieved by creating a verified list of accounts using the Account Property Bundler on a separate node.
Closing Thoughts on Bundlers and Continuing Your Learning
That’s it for bundling. Feel free to begin experimenting with this powerful functionality and remember to take full advantage of the 5 custom bundler templates provided by Jelurida (release notes). Additionally, developers are always welcome to create their own custom Bundlers at any time.
Hopefully, this guide provided a sense of the strategic business design of the Ardor platform. The multi-chain environment has created the ability for businesses to customize fees for their end users while operating with predictable day-to-day transaction rates. Continue reading about the new Transaction Voucher function, which makes it easy to send dual signature invoices and share distributions on the blockchain. They also make it possible to create counterfeit-proof “deposit” and “withdrawal” vouchers.
Turing-complete lightweight contracts represent the next generation in smart contract technology and it’s a feature exclusive to the Ardor ecosystem. Written guidance on lightweight contracts is available here and you can refer to several articles describing the functionality [1]

