Introductory tour of ardors features
This guide provides an introductory tour of the live features available on the Ardor “parent chain” mainnet as of August 2018. The information presented here represents a modified version of the information in the 11-minute long video Blockchain Ardor: Demo and Tour of Ardor and Ignis Features
If you would like to participate in this guide in real-time, you will need to download the Ardor Client from the Jelurida website. An article explaining the download process is available here.
Ardor Feature Tour
Open your Ardor desktop client and log in to the Ardor chain.
Verify Your Public Address — First Time Users
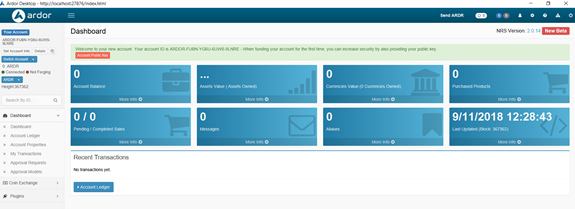
If this is your first time accessing your Ardor account through the client wallet, you will likely see 8 blue boxes on the Dashboard and a message across the top to validate a public key (pictured below).
Normally, you should only see 2 blue boxes on the Ardor dashboard — but you must complete the validation of the public key first. You should click the orange button in the message bar, enter your secret passphrase, and then copy the newly displayed public key. Once you are ready to make your first transfer of funds to your Ardor wallet, you must include the public key in that first transaction. This will literally change the interface you see in the client.
Ardor Dashboard
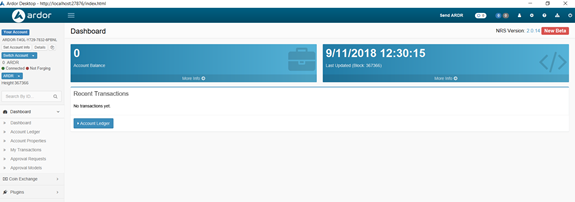
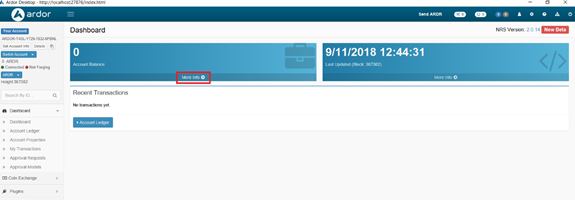
Now that your account is verified, there are 2 blue boxes on the Ardor Dashboard — your account balance and the most recent block information. Your recent transactions on the Ardor chain are listed below.
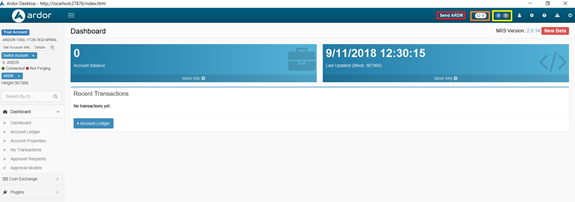
Looking at the very top of the screen, you see the button to Send ARDR (indicated in red below) — this is how you would begin a new transaction.
The circular symbol (indicated in orange above) is a shortcut to your Unconfirmed Transactions. Notifications are represented by numbers displayed in the blue and gray circles (indicated in yellow above). The symbol of a person is a contact book, the gears are a shortcut to your settings, the question mark takes you to guidance documentation, the tree chart takes you to the web wallet, and the power button logs you out.
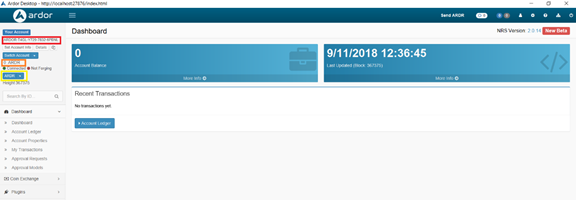
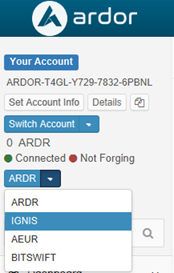
The current account’s public address is located in the upper left corner (red). Beneath that, you see the current Ardor balance (orange), and the blockchain we are currently on (yellow).
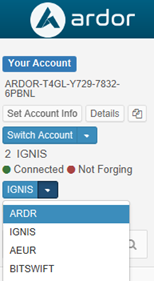
Remember, child chains are their own blockchains, they are simply secured by Ardor. So, if you want to use the functions of a child chain or see balances on a child chain, you must navigate to the specific chain.
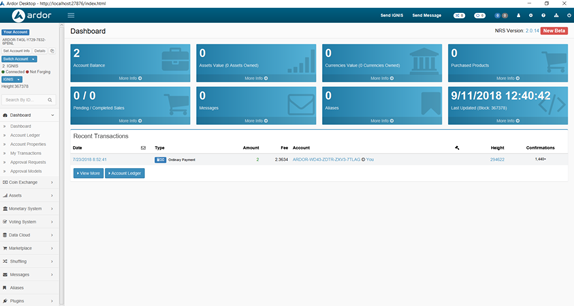
For example, we see in the photo below that Ignis has far more functions built-in, and there are multiple balances on the Dashboard.
If you are interested in learning about issuing assets, new monetary supplies, marketplaces, messaging, cloud storage, and other functionalities — you should check out the article on the features of Ignis, available here.
Search Box
Let’s navigate back to the Ardor chain.
The next box allows you to search for specific accounts, transactions, or assets on the blockchain.
Understanding Your Two Ardor Balances
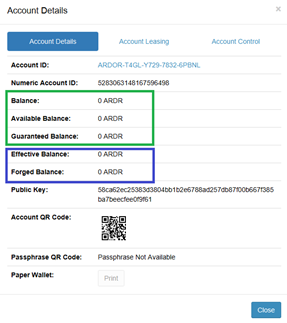
Let’s focus on the main dashboard for another minute. Click on the “more info” button under Account Balance and let’s discuss some key terms.
Your Ardor coins have two “values.” There is the actual coin itself, and the power of the coin to secure the network through Forging.
Actual Value (green in the image above)
That first value of the coin, the coin itself, is represented by the first 3 balances: Balance, Available Balance, Guaranteed Balance. The only difference between these 3 is the Guaranteed Balance updates every 1440 blocks or approximately every 24 hours.
Forging Power (blue in the image above)
Now, the second value of your Ardor coins, the securing power of the coins, is represented by Effective Balance and Forged Balance. Both require 1440 blocks to update.
The important thing to understand is that the actual value of your coins (Available Balance) represents your current spending power at a given moment. Your Effective Balance can be 0 for a variety of reasons, such as leasing your balance to a forging pool, but you always retain your spending power based on Available Balance. If you are interested in learning how to begin forging or leasing your balance, refer to Begin forging and leasing
Decentralized Coin Exchange
Here, you can begin trading between Ardor and its child chains.
An important note about Ardor is the fact that all of its child chains are interoperable — meaning, you can trade directly from one to the other without needing to convert to Ardor or any other intermediary token.
Another point here — when you are on the Ardor chain and you enter the coin exchange, you can buy Ignis using Ardor. But, if you want to do the reverse transaction and you want to buy Ardor using Ignis, then you must initiate that trade from the Ignis Child Chain’s coin exchange.
Moving on, you can review your open orders and exchange history in the left side menu.
Continuing with learning the basic features on Ignis
During this guide, we have only just begun to scrape the surface of what Ardor can do. For those of you looking to keep it simple, continue learning about the basic features available on Ardor’s first child chain, Ignis.
You also have the option of learning more about the revolutionary features of Ardor, such as Transaction Vouchers, which make it easy to send dual signature invoices and share distributions on the blockchain. They also make it possible to create counterfeit-proof “deposit” and “withdrawal” vouchers, Learn more
Turing-complete lightweight contracts represent the next generation in smart contract technology and it’s a feature exclusive to the Ardor ecosystem. Written guidance on lightweight contracts is available here and you can refer to several articles describing the functionality [1]

